
Device Inspection Analysis
Overview
Running a patterned wafer scan with Device Inspection analysis requires the following prerequisites:
Loading sample onto nSpec stage
Creating an image settings group
Configuring autofocus settings
Creating a north-south-origin alignment
Creating a focus point pattern
Creating a device layout
Once all prerequisites are complete, it’s time to setup a scan with a Device Inspection post-analysis.
The first time a device inspection scan is run, we will create a new “golden template” of the wafer. Refining this golden template often requires running device inspection scans multiple times before getting a golden template that is suitable for use in production.
The golden template represents what a perfect, defect-free device should look like, and is a composite of all scanned device images. Once generated, the template is compared to individual devices to detect defects and deviations from the template.
We will go through the process of creating a golden template for the first time, which often requires running multiple scans to acquire more image data to use for the composite golden template image.
Scan Setup
To open the scan settings dialog, navigate to nScan - Stage View > Scan > Sample…
First, name your sample. Then, under Focus we will choose our autofocus settings and focus point pattern. Under Pattern, we will select the Devices radio button to run a patterned wafer job, and then point to the north-south-origin alignment file and device layout file.
Next, we will setup the Post Scan Analysis. We will run this job and launch a Device Inspection to run after scanning. The three dots next to the Parameters field can be clicked to edit the parameters.
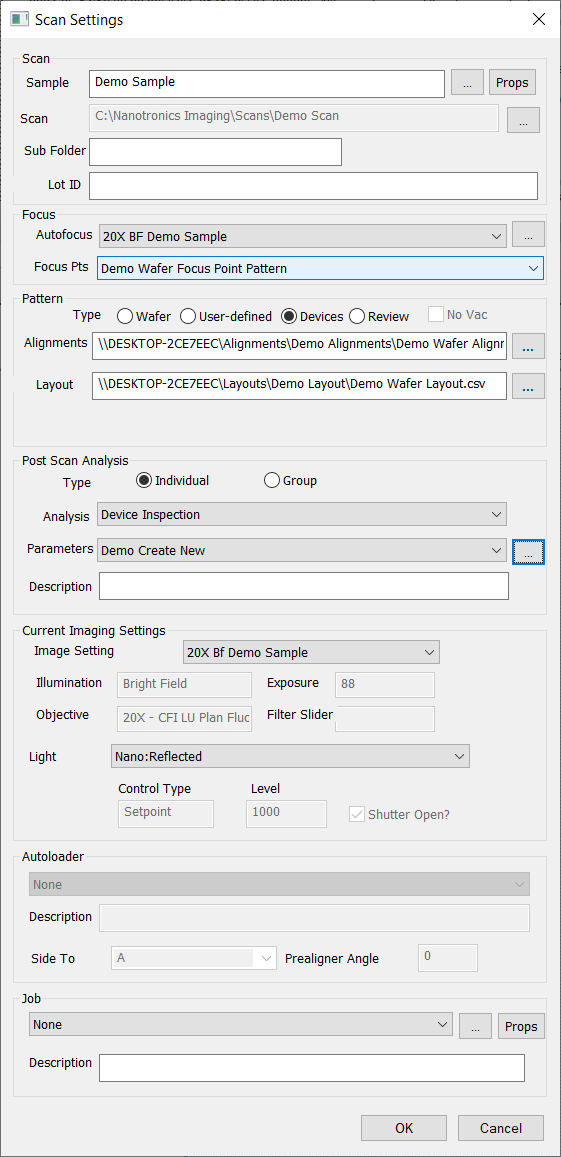
First, we will set the export location and file name of the template by setting the Golden Template parameter to C:/Nanotronics Imaging/Templates/Demo Templates/Demo Wafer Template.
Next, because we are running Device Inspection for the first time for this patterned wafer, select the Create New parameter value under Generate Golden Template to create a new golden template.
Then, in order to reduce the processing power needed, we will change Device Inspection analysis parameter Golden Template Processing Batch Size from -1 to 1. Setting this parameter to -1 will automatically calculate batch size. Changing the batch size parameter to 1 will reduce the amount of processing power needed by restricting the number of images per device to process at a time to 1.
Make sure to click Save As to save your analysis parameter settings.

Lastly, under Current Imaging Settings, point to the image group settings. In this guide, we are running a manual job, but if running a job with an autoloader, make sure to point to relevant autoloader settings. Autoloader settings are setup by Nanotronics service technicians.
Finally, click the three dots in the Job section to save the scan settings as a job. Click OK to start the scan.
Viewing Results of First Scan
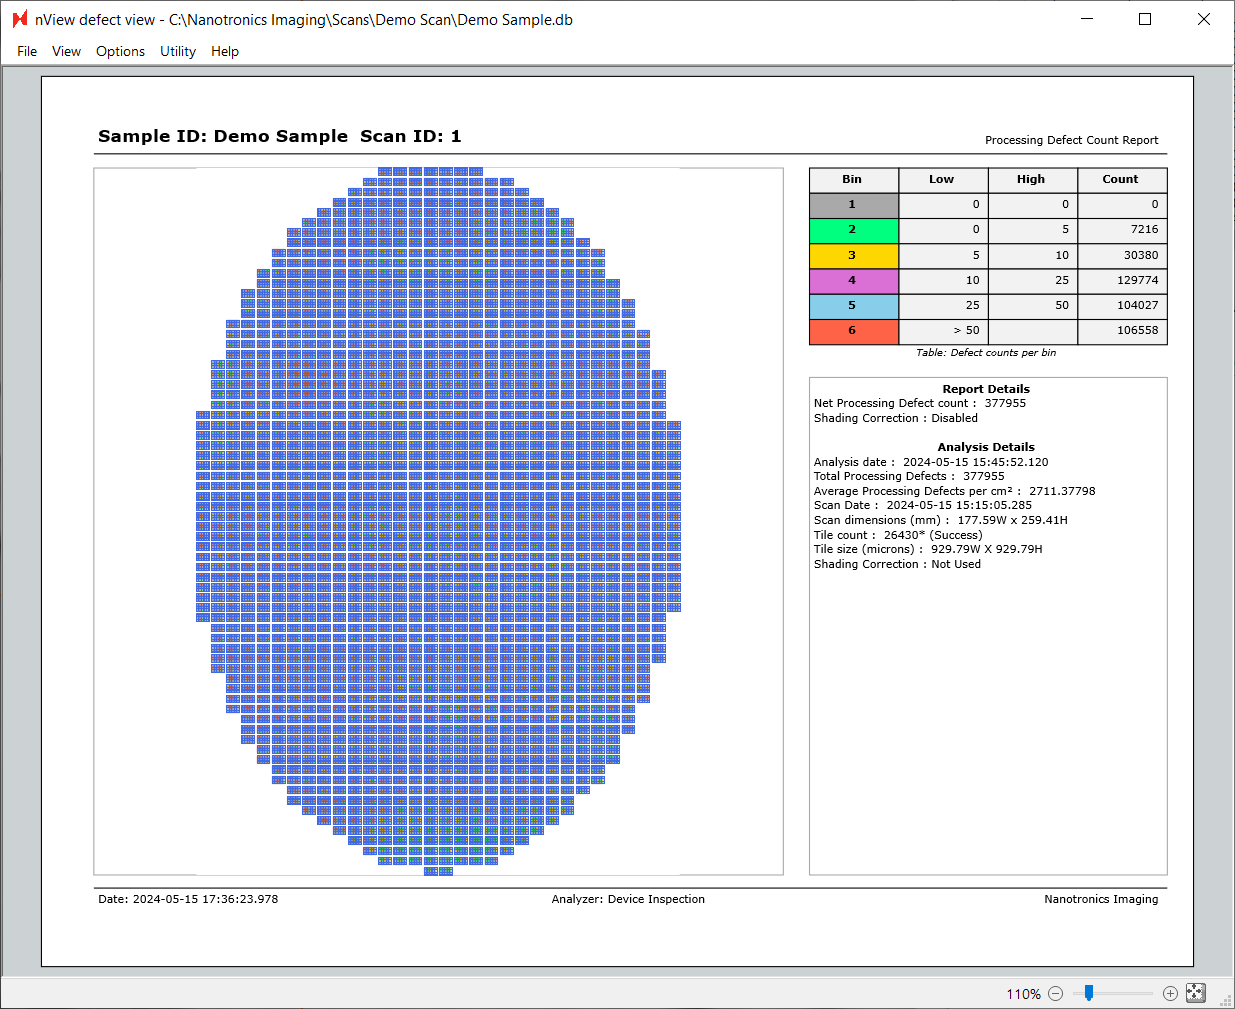
After the job completes, the post scan analysis will automatically run. In this example, Device Inspection will analyze the scanned images and launch an nView defect view window which summarizes the findings of the Device Inspection analysis.
Clicking on the image tiles in Defect View will load an image of the detected defects found during Device Inspection.
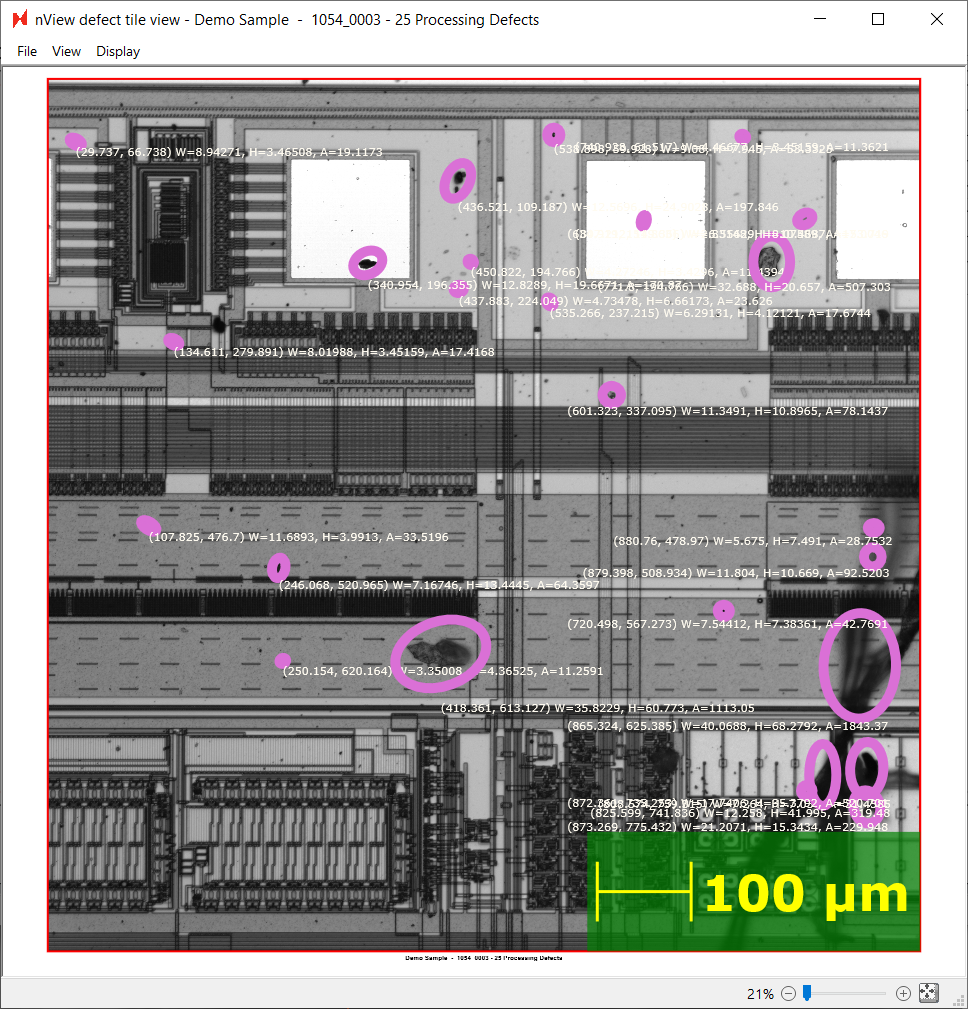
Looking at this tile, we can see that many defects have been detected, but many have not been detected.
To troubleshoot this, we will look at the golden template, which will be at the path that we specified in the Device Inspection analysis parameters at C:/Nanotronics Imaging/Templates/Demo Templates/Demo Wafer Template. Below is one part of the template, which we see is rather blurry, which tells us that our device layout was likely not perfectly aligned everywhere on the wafer.
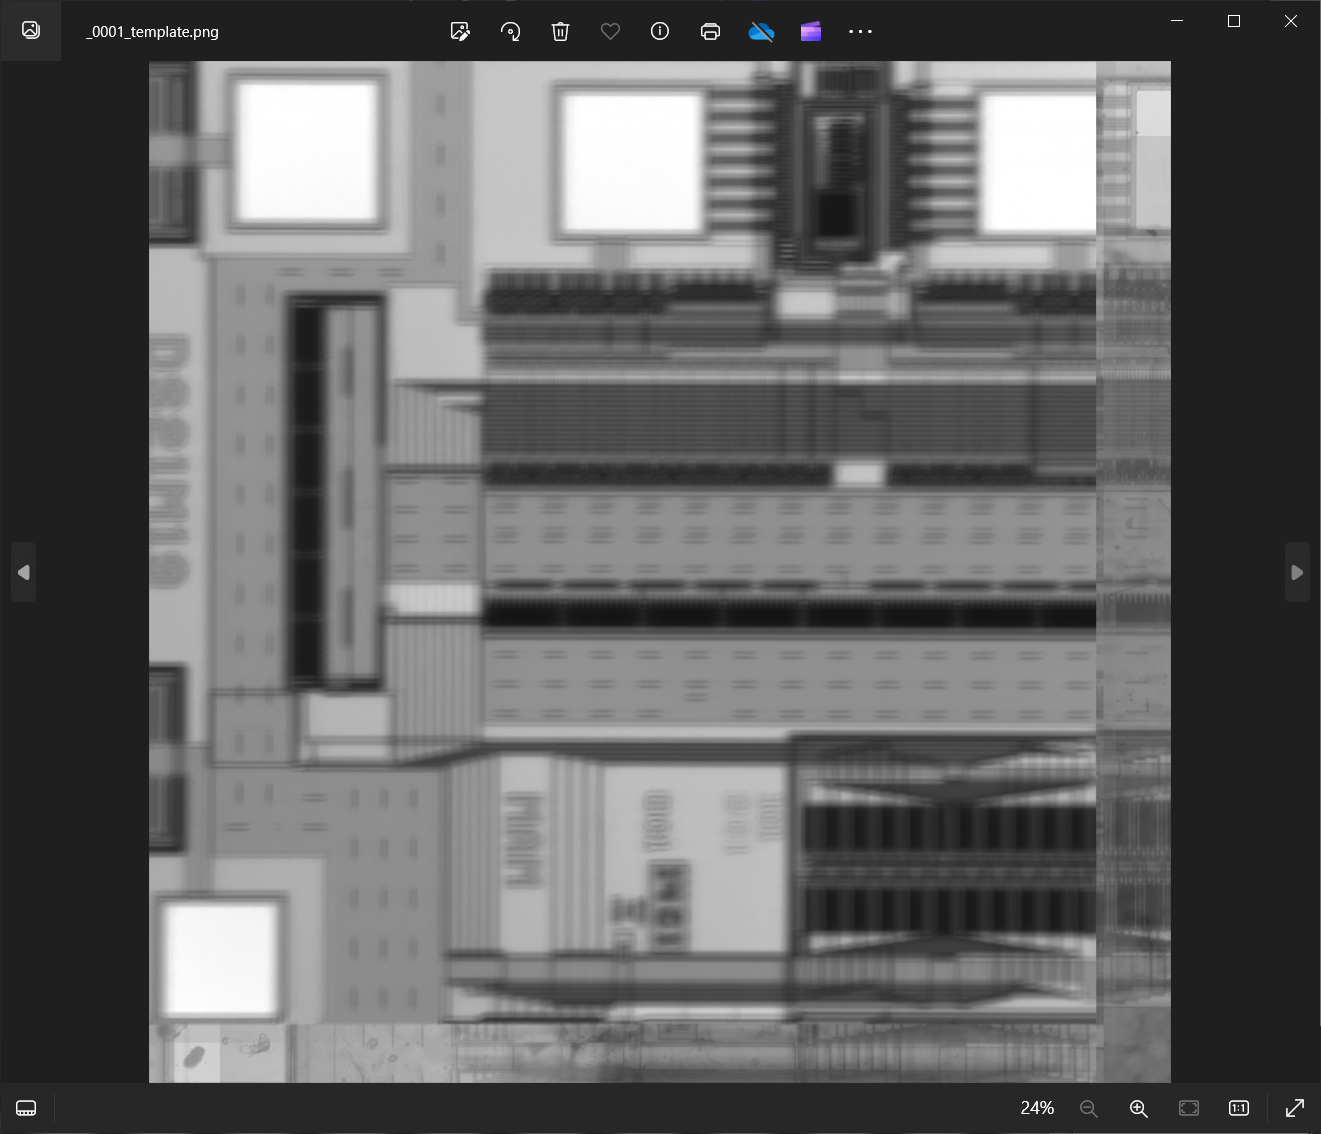
We can compensate for this by increasing the Padding (Pixels) parameter in the Device Inspection analysis parameters dialog from 300 to 700 pixels. This parameter represents the radius nSpec will use to register the template to the scanned image. We will set Generate Golden Template to Create New again.

We will run this scan and analyze again using this new padding value.

Second Scan
After changing the parameters between the first and second scan, the golden template looks much clearer than before. We will now continue improving the golden template with more scans.

Improving Golden Template Through Iterative Scanning
We recommend running jobs with more samples, ideally an entire lot of wafers, to improve the quality of the golden template. For subsequent jobs, we will change the Device inspection analysis Generate Golden Template parameter to Add to Existing.
The number of scanned images needed to improve the golden template quality will depend on the device size (e.g. smaller device size means more device samples per wafer), and also on the desired detection accuracy. We recommend iteratively scanning and checking the Device Inspection analysis results to see if the defects of interest are being captured.
Once the golden template quality is satisfactory, change the Generate Golden Template parameter to Do Not Generate Template when running Device Inspection. This will ensure that the existing golden template is not modified going forward.